So, you’re ready to start creating your first blog post using the Gutenberg block editor. Let’s dive in and learn more about the three most commonly used blocks in WordPress: the paragraph, heading and image blocks.
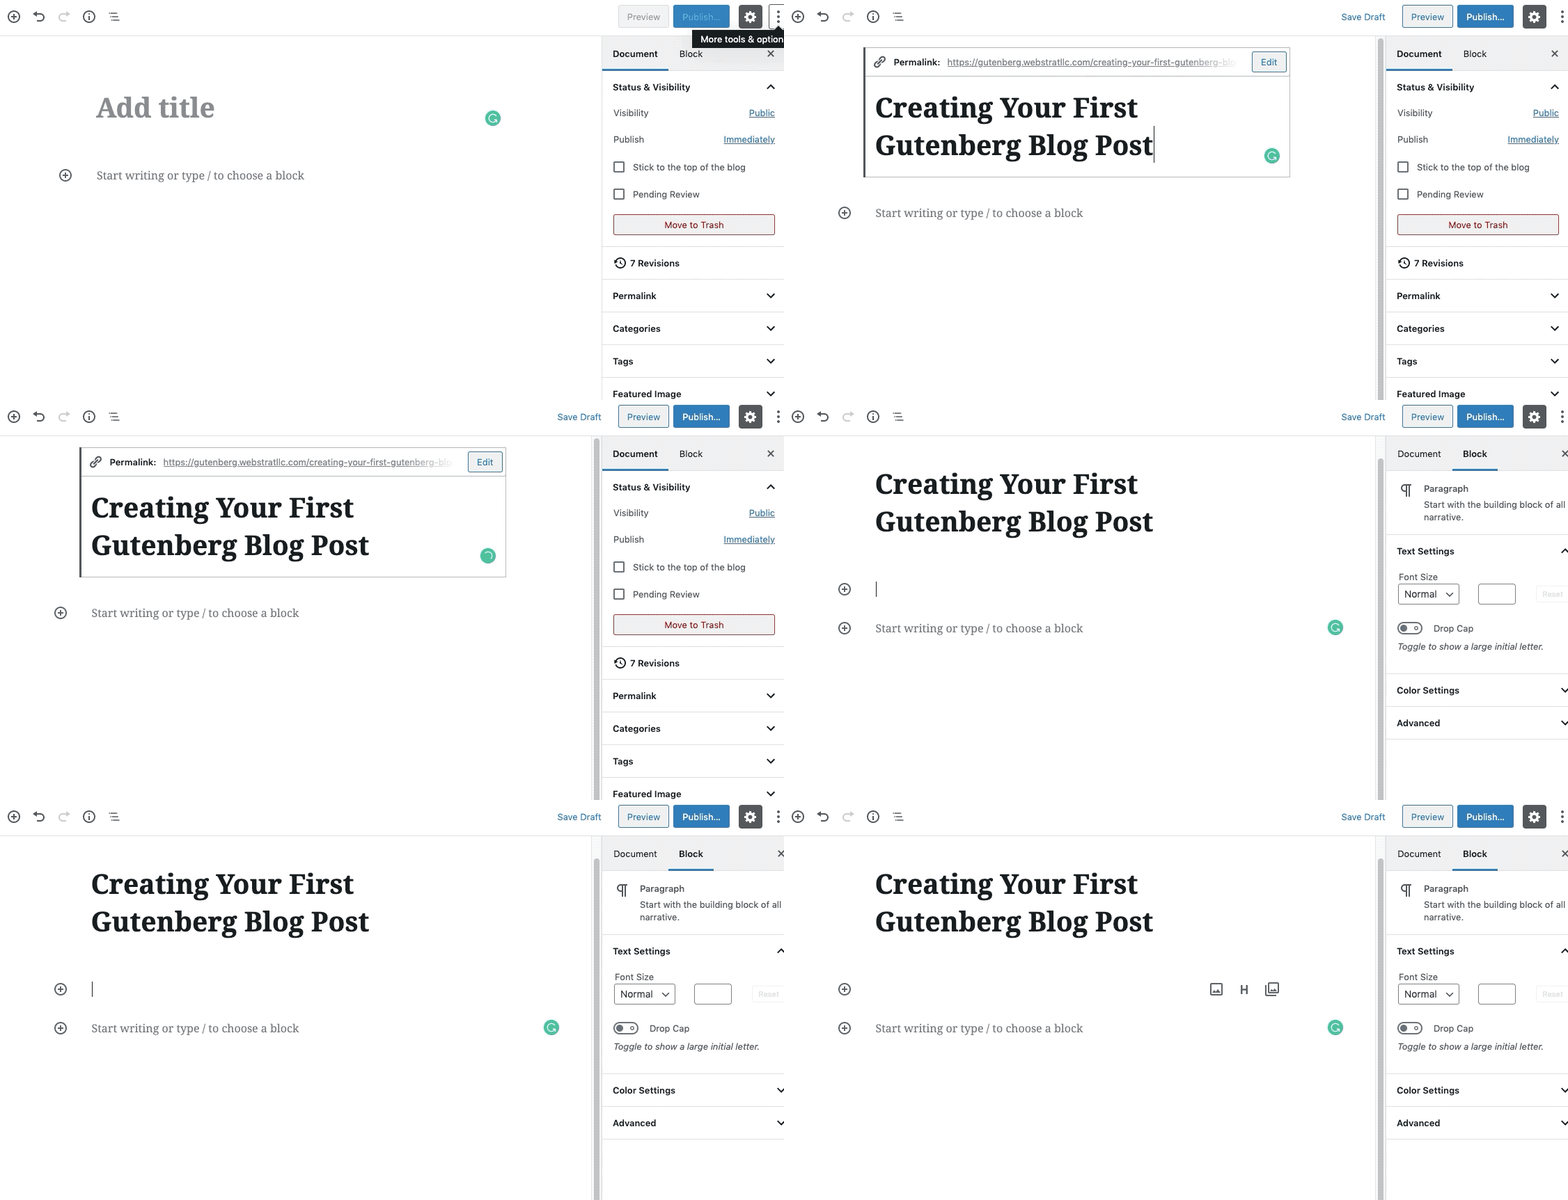
Each post and page begin with two empty blocks, a Title and a paragraph block.
Title & Paragraph Block
The title block is where you add the post title. After entering the title, hit return or enter on the keyboard, your cursor will automatically go to the next block, which is a paragraph block by default.
Paragraph Block
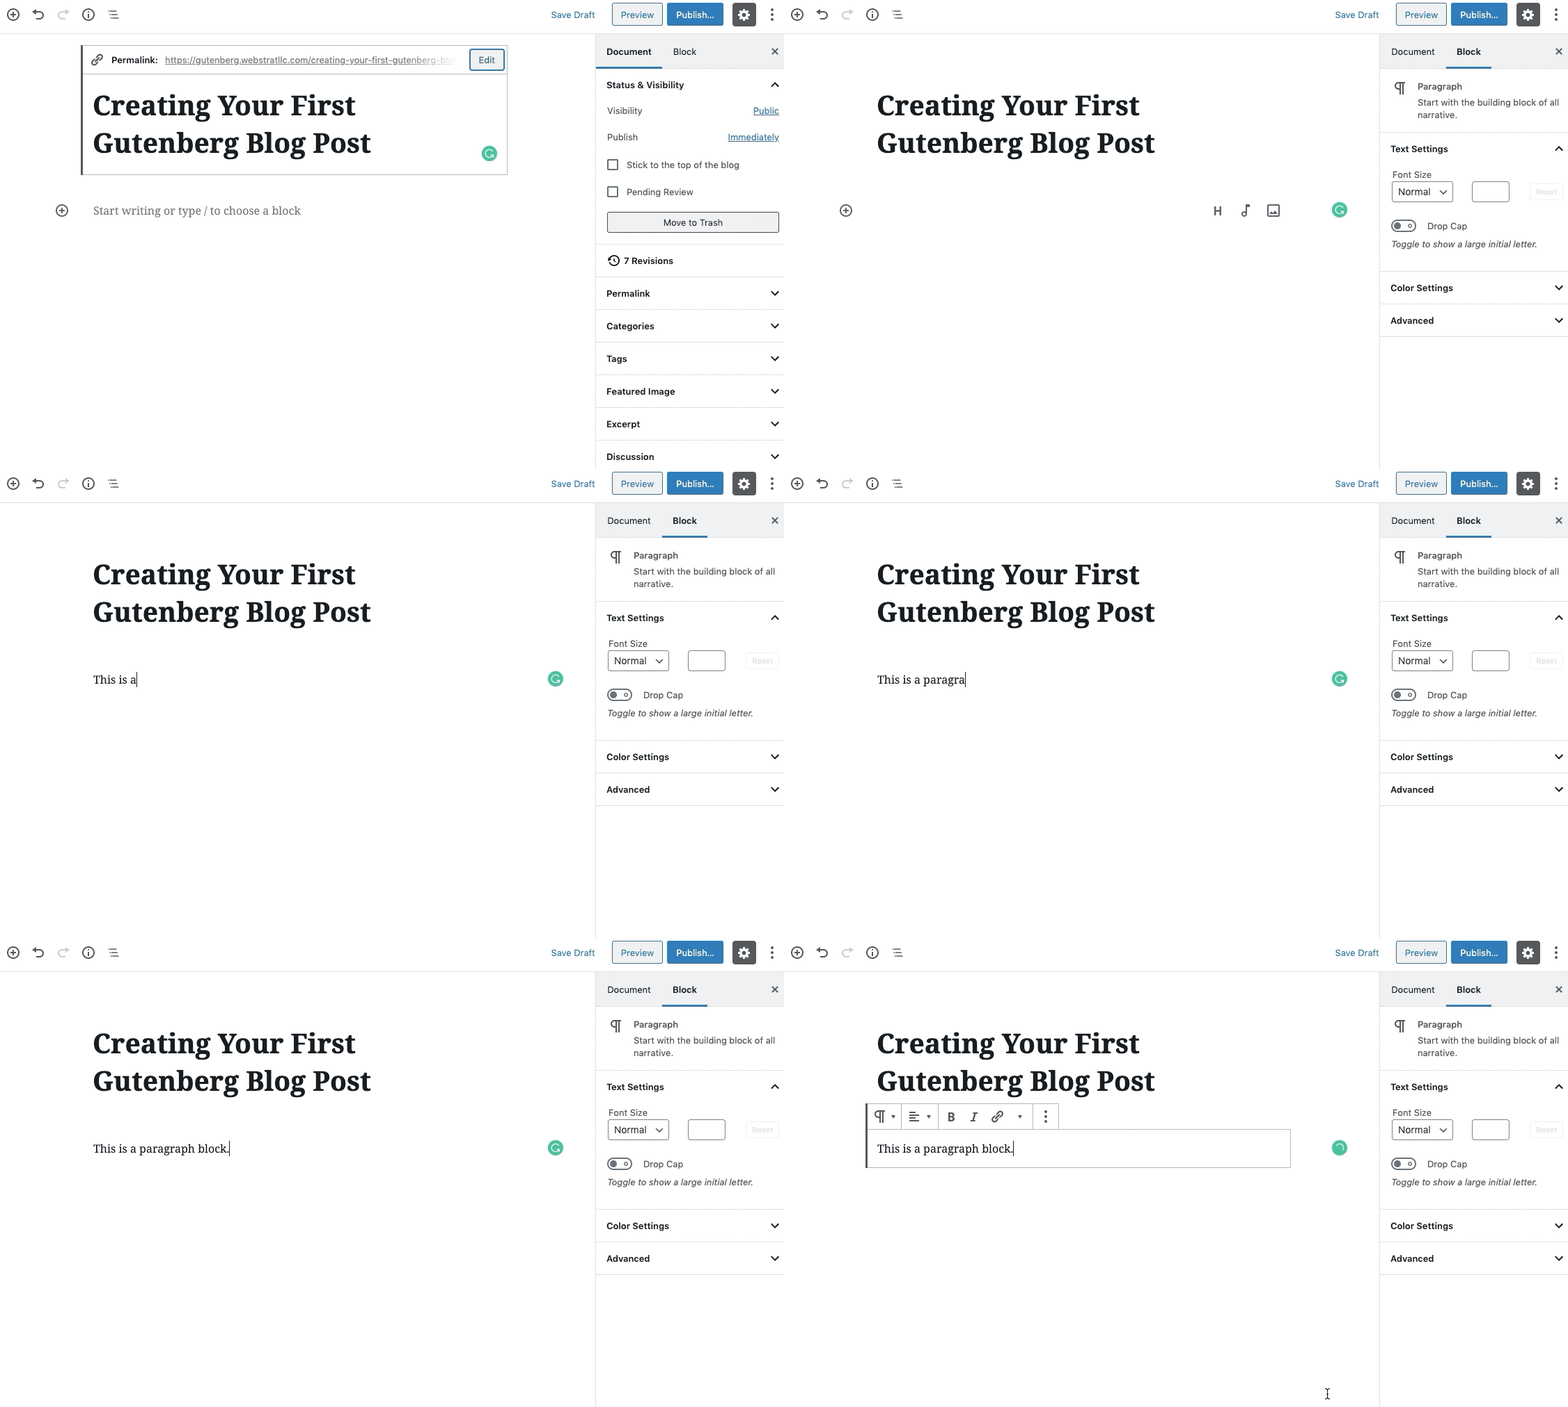
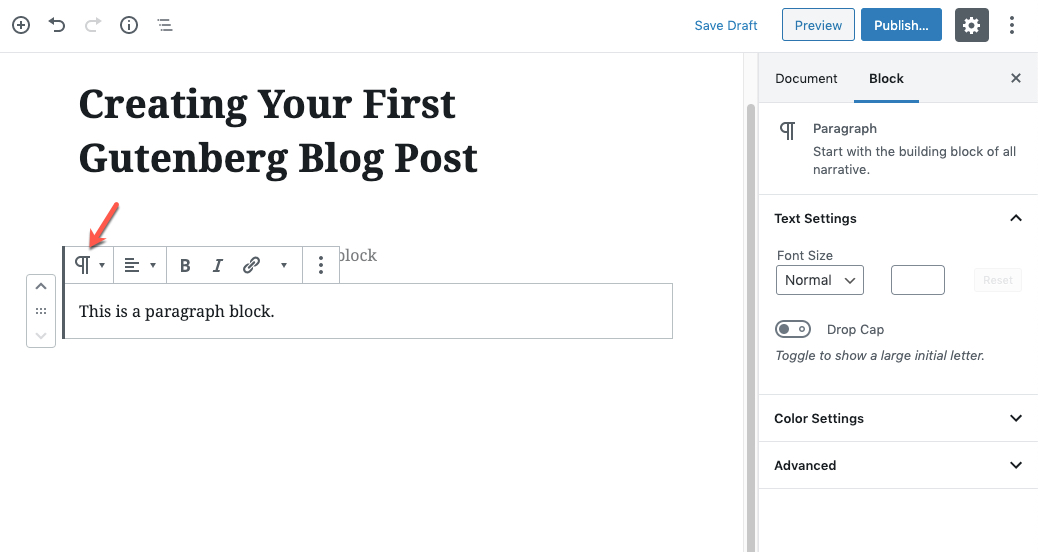
To enter text, use the paragraph block. Hovering over or clicking on the block allows you to see the tools associated with this block.
The block has an icon to tell you the type of block it is.
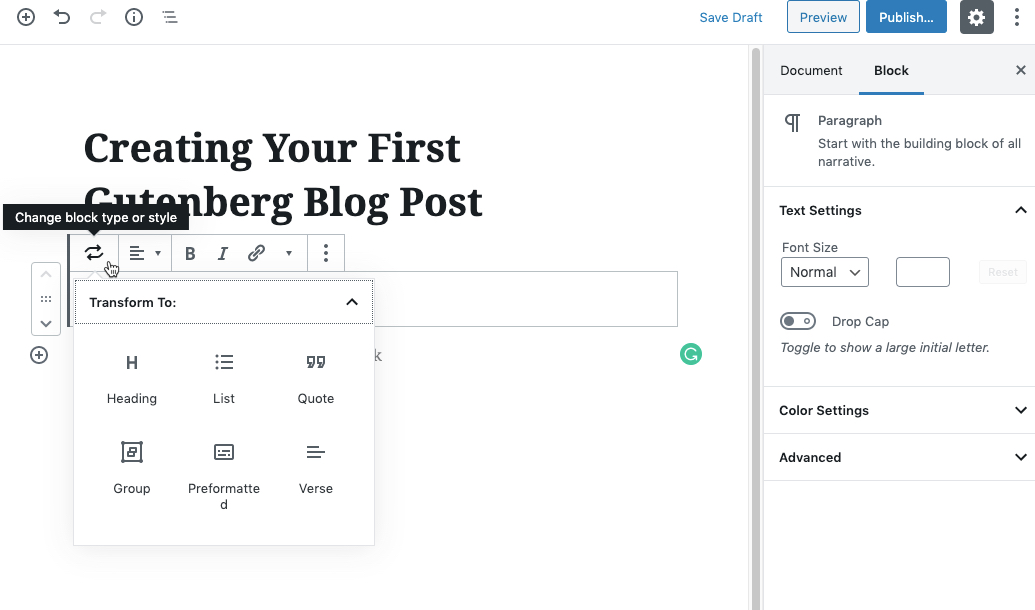
Clicking the down area will bring up a limited set of related blocks. These are things that a paragraph block can be transformed or changed into. Each block has a different type of related blocks.
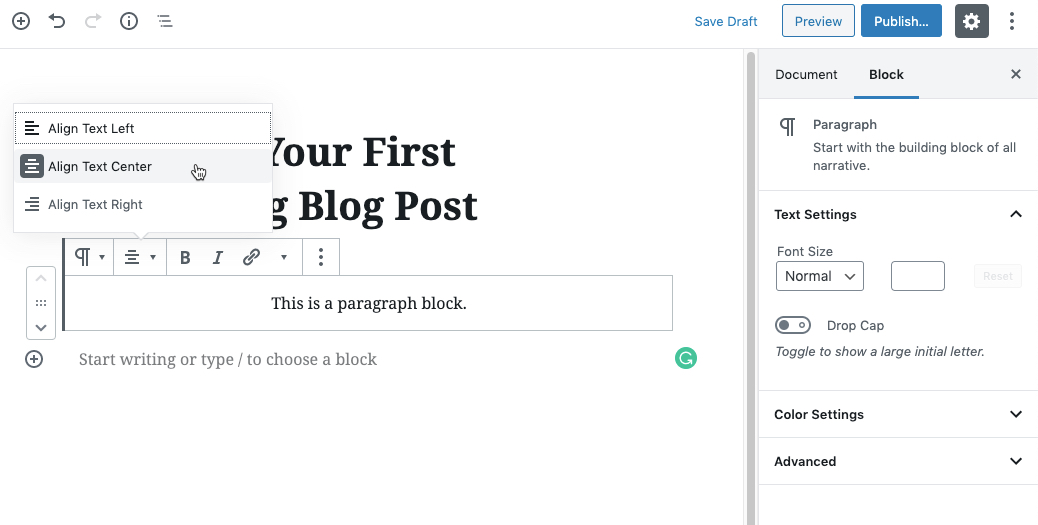
Next is the alignment tool, where you can format your text center, left or right.
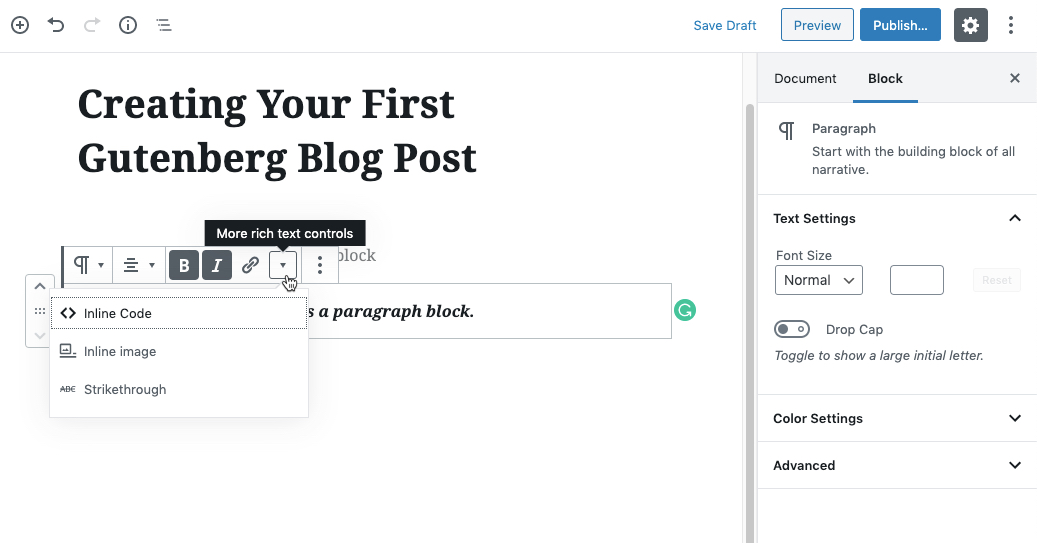
To apply bold or italic text, you will need to first highlight the text and then select tool.


To add a link, highlight the text you wish to link to and select the tool.

The down arrow provides you with the rich text tools: inline code, inline image and strikethrough formatting options.
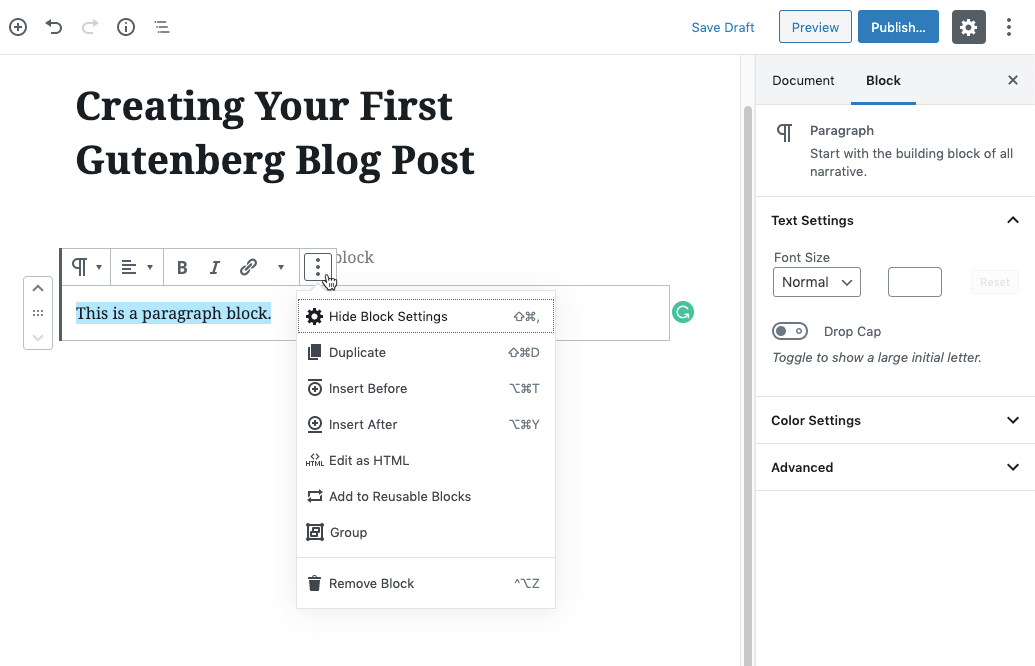
Clicking on the ellipsis icon provides even more tools. This is also where you would go to delete a block.
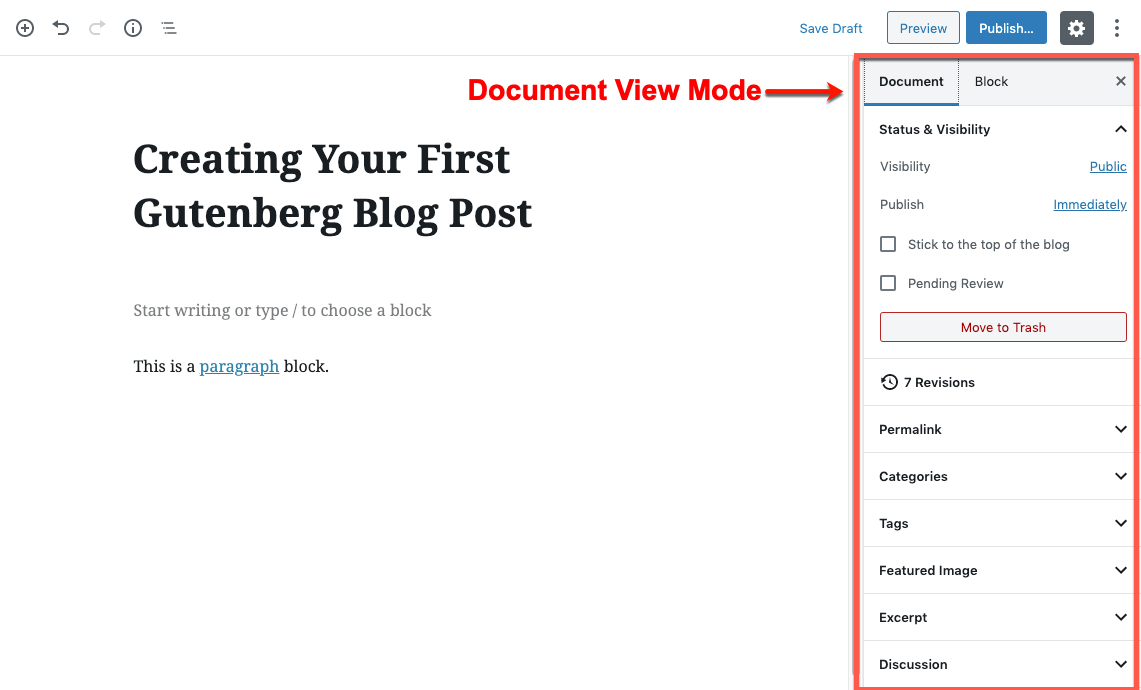
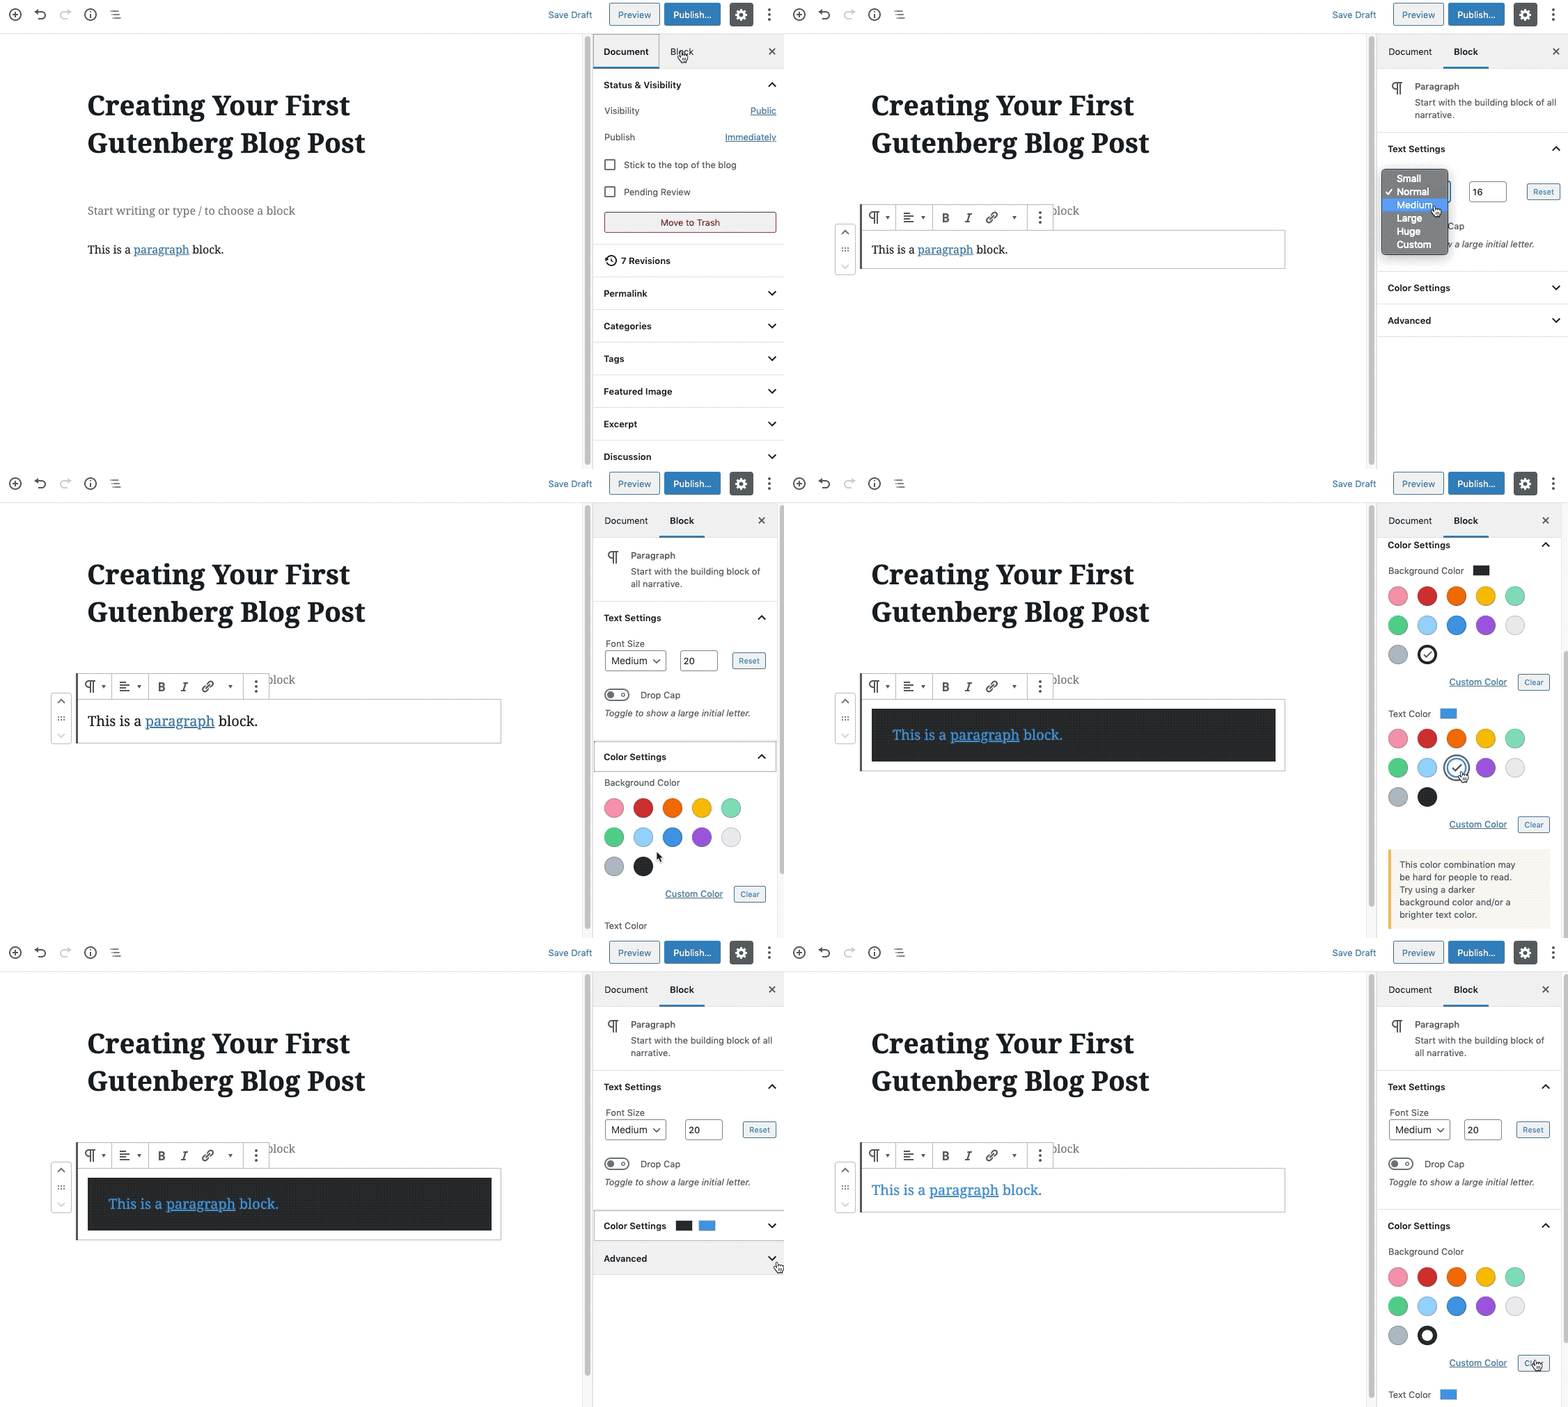
When the block is not highlighted, you are in the Document View Mode.
When the block is highlighted, you are in the Block View Mode.
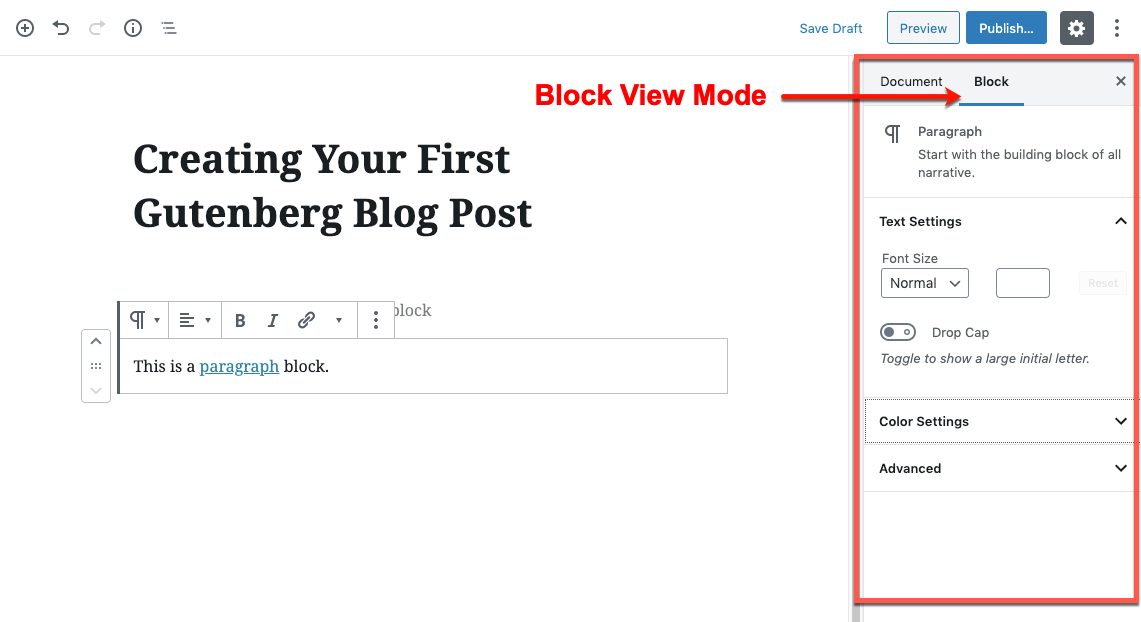
The Block view mode gives additional styling options, such as changing the font size or adding a drop cap. Expanding the Color Settings option allows you to change the background color of the block and the text color. The Advanced option provides an area to add CSS classes to further style that particular block. The options you see in this column may vary depending on the theme you are using.
Headings
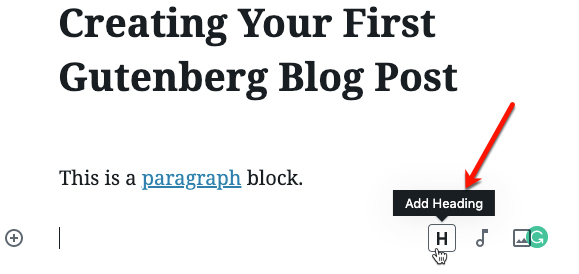
There are a couple of different ways to add headings. If you are still inside a block, you can hit enter on your keyboard and a new block is added. If you click within the block you will see three gray icons that represent your most frequently used tools or the next logical block determined by WordPress. The H icon indicates the add Heading.
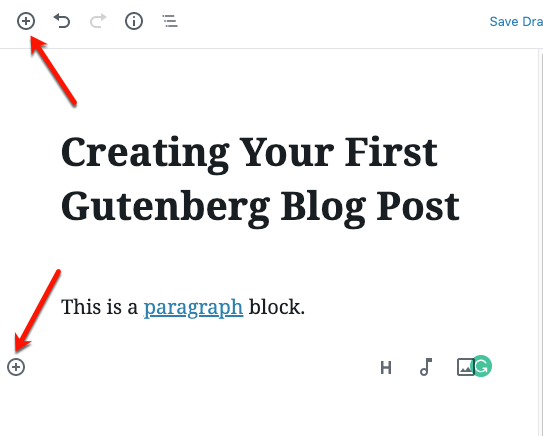
You can also use the Add Block tool located at the top of the page or within the block and select Heading.
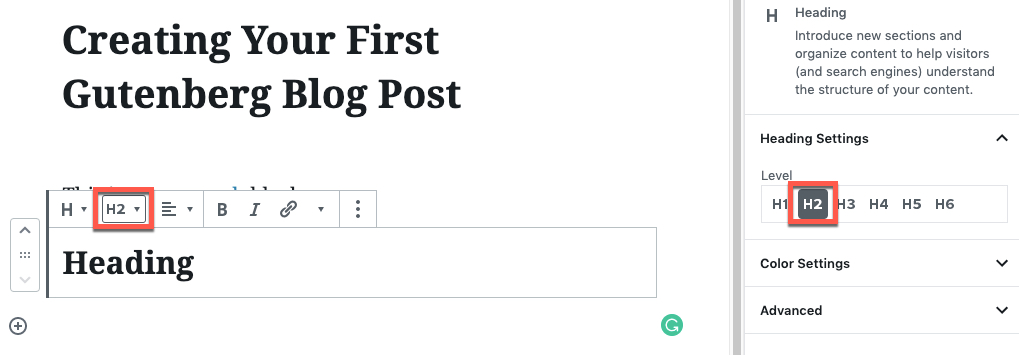
The Heading block will be added and is automatically set to H2. If you are alright with this setting, then you can add your heading or click on the dropdown and change it to a different heading size. After entering your heading text, you can use the extra formatting options to change the heading size, adjust the alignment, make the heading bold or italicized or add a link. You can further customize the heading using the Block View mode in the side bar on the right.
Images
If you want to add a single image, use the Image block. This block is added the same way as any block, using the Add Block icon in the top toolbar or within the editor. Once the Image block is added, you are presented with a dialog box that gives you a few options for adding images. You can either:
- Upload – Upload an image directly from your computer.
- Media Library – Choose an image from your media library.
- Insert for URL – Paste in the URL of an image (usually from an external website).

Once you have inserted the image, you will notice that the tools available are for images.

By selecting the transform or change style icon, you can change the image block style that a block that the theme supports.

As with the other blocks, there are tools for alignment, editing the image, linking the image to a URL, or removing the block. If you want to change the image settings, use the block column on the right.
Caption
Image captions can be added inside the block, just under the image. Just click where it says “Write caption…” and enter the text. A small set of text-related tools will be displayed. If you hit enter at this point, it will create a new text paragraph inside the image block and not a new block.

Insert Block
There are a couple of different ways to insert a block above another block. First, you need to unfocus the block you are working on by clicking a blank spot in the post area. Then hover your cursor just above the block where you want to insert the block and you will see that + icon. Then select the block you want to add.

Move Blocks
If you want to change the block order, hover over the block you want to move and select the up or down arrow to move the block up or down one space.

Remember before leaving your post or page make certain that you click on Save Draft or Publish so that you don’t lose your work. Note that to Publish a post or page you must select Publish twice.
If you are interested in learning more, then visit our Gutenberg page and explore our list of ever-growing resources.
Thought this was helpful? Stay tuned for my next Gutenberg/Block Editor article on Bullet Lists and Blockquote Blocks.

